After watching Sugimoto’s video demonstrating his technique, I had a rough idea of how to use the Van de Graaff Generator to produce a print in the dark room. I started by setting up the generator in a clear space to avoid accidental discharge of the electricity. The cables and wires were also checked for defects that could lead to an accidental discharge. I also placed a discharging rod next to where I would be working so I could safely discharge without receiving a shock. The machine was also tested a couple of times before I turned to the red light in the dark room.
My first experiments consisted of some basic tests to make sure the process was actually producing images. I placed a sheet of photographic paper on the desk next to the machine. Then I stood on a plastic box to avoid grounding myself and placed one hand on the sphere at the top of the Van de Graaf (this is where the charge is drawn to). While one of my hands was in contact with the sphere I turned the machine on and then started touching the photographic paper with my free hand. This channeled the charge from the Van de Graaff through myself and onto the surface of the paper.


After I had finished with the first sheet I developed it the same way as a regular black and white print, (2 mins Dev, 15 secs Stop and 10 mins Fix followed by a 15 minute rinse). The results from the first test weren’t quite what I was hoping for, although the fact it was leaving an imprint of the charge on the paper was encouraging. The imprints themselves were no bigger than the tip of the finger used to transfer the charge and didn’t really have any defined sparks imprints. I carried on with a few more sheets trying different techniques to try and alter the results.
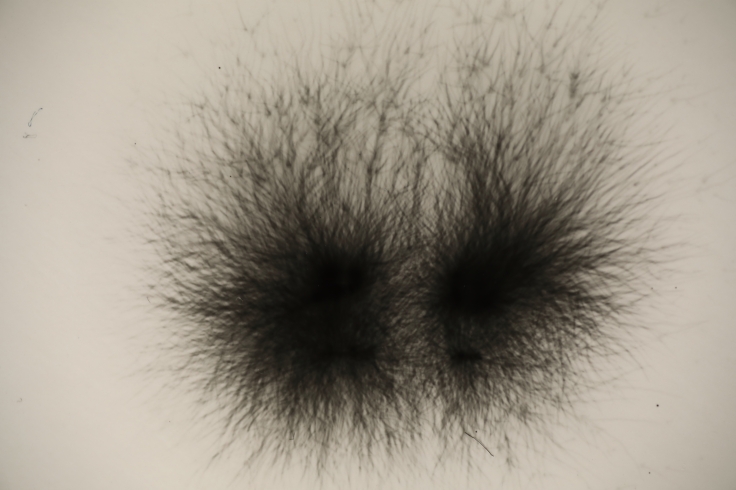
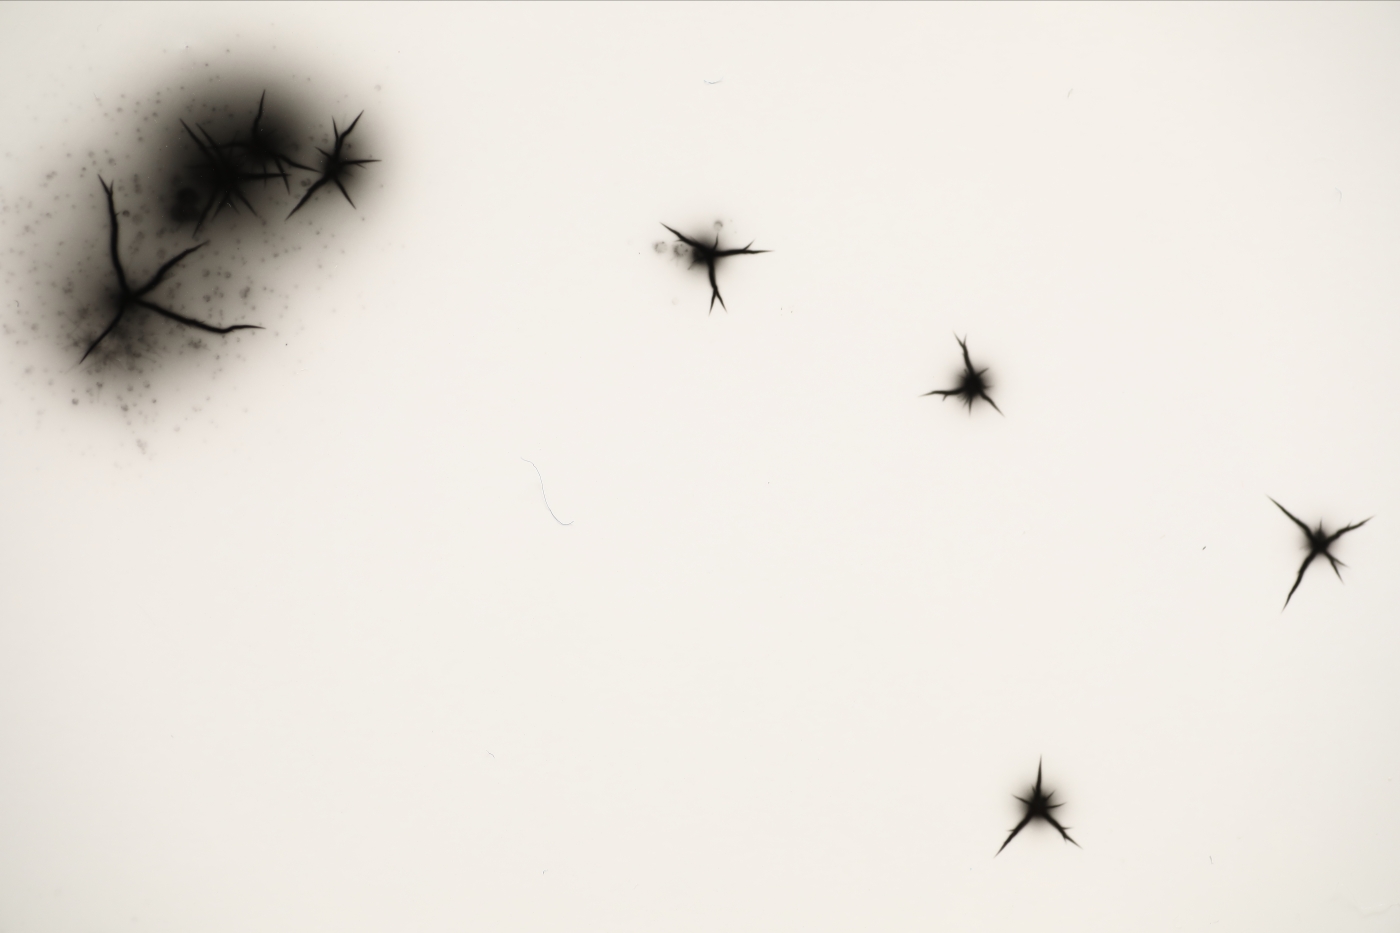
The next technique I wanted to try was to let the charge build up for a while before touching the paper. I also held my finger on the paper for a couple of seconds, while on the previous sheet I had only briefly touched the paper each time. This method produced a slightly better result, however it was still only the size of the tip of my finger. There was definitely more of an imprint from the charge in comparison with the first test. The center of where I made contact looked extremely dark and the charge had a fuzzy, hairlike appearance throughout the rest of the imprint. My next step was to reduce the fuzziness of the print and to find a way of avoiding a dark mass in the center of the imprint.

After a few failed attempts and a couple of sheets that went straight from the Dev tray into the bin, I found a solution to the fuzziness and dark centers I was getting in my previous attempts. I noticed while I was waiting for the machine to charge, there was a blue glow around the tip of my finger. This was plasma which was caused by the charge in my finger ionizing gasses in the surrounding air such as Nitrogen, Oxygen and small amounts of Hydrogen. This was affecting my imprints in one of two ways, either the light from the glow was causing the paper to fog and resulting in a darker center. Alternatively the plasma could be transferring a small amount of electricity onto the paper which would in turn cause a darker center. To get around this I used a cable attached to the sphere on one end, with a small metal electrode at the other end, (The electrode was insulated apart from the tip which should reduce the amount of gasses being ionized). I held the electrode over the surface of the paper and gradually got closer until a spark bridged the gap. Once the spark had jumped I moved the electrode away to avoid any plasma fogging as there was still a small glow being produced by the electrode. This method left a much more defined spark imprint whilst almost eliminating the dark centers. I had a few more attempts using this method but was unable to produce bigger imprints of the sparks. I think a machine with a higher power output would be necessary to produce larger, more intense sparks.
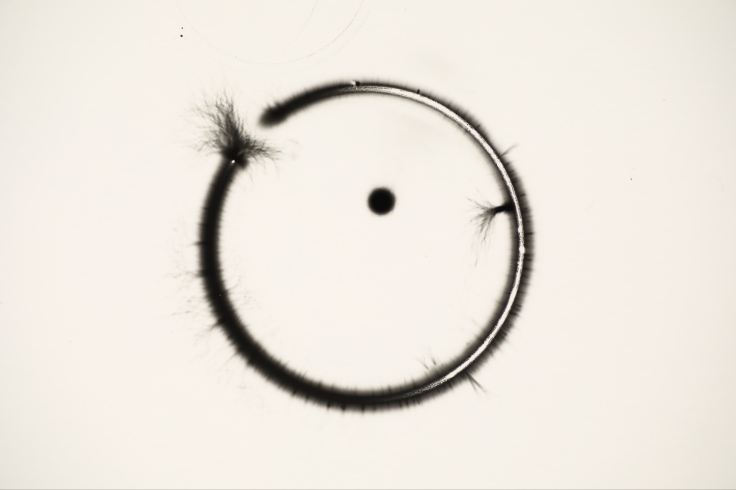
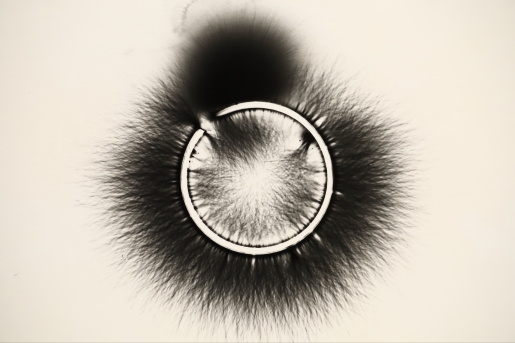
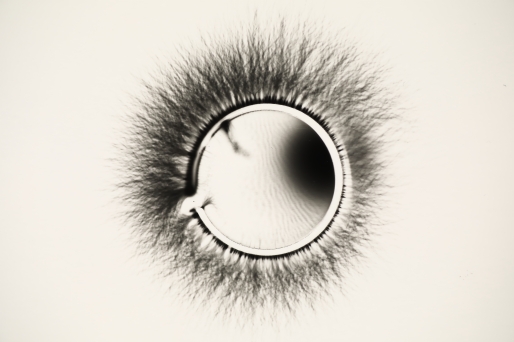
For my next experiment I placed a key ring on the paper and used the electrode to transfer the charge to the key ring. I used the same method of holding the electrode above the surface making sure I didn’t touch the electrode to the key ring. The result from this method showed an imprint of the key ring with some small sparks jumping out from the opening. There were a couple of other places along the ring where small sparks were emitted. I think this may be due to imperfections in the metal itself, or scratches on the surface of the metal. The black spot in the middle of the ring was caused by an impurity in the paper itself. While the spark was bridging the gap to the key ring there was a tiny bright blue speck on the paper that glowed the whole time the electrode was near. It almost looked like a pixel on a screen where it was so bright and nothing surrounding it was affected. This resulted in a larger black spot caused by the light produced from this impurity.
For my next tests I decided to let the charge build up, then touch the electrode to the key ring for a fraction of a second. This method displayed a sharp imprint of the key ring, however the imprint of the electricity was back to the fuzzy, hairlike imprints from my first experiments. To avoid this I think I need a higher voltage and a way of controlling the duration of the charge transfer. Both of these would need different machines and additional equipment that I didn’t have.


As I wasn’t able to increase the output of the machine I decided to make some more prints with the key rings. This time I tried placing one inside a larger one, and side by side in another print. I wanted to see if the charge would jump from one ring to the other, and if so what it would look like.


I carried on with some more experiments using this process. I gathered any metal objects I could find around the dark room. The prints above are from a pair of safety scissors. While the one below was from a box of random keys.
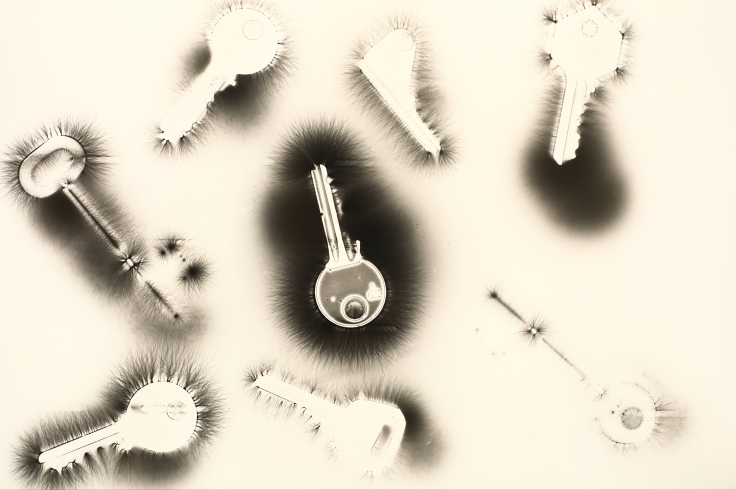
Some of the keys had writing on which appeared mirrored in the positive prints, I photographed the print and flipped the image in Photoshop to get the writing the correct way. I also inverted the image to negative, I found that using the whites to show the electricity made the images stand out more.
")
For my next stage of experimenting I need to find a way to increase the voltage coming from the Van de Graaff. This should produce bigger, bolder arcs of electricity as it flows through the objects onto the paper.


Leave a comment